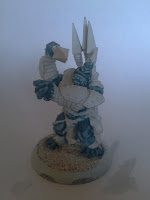
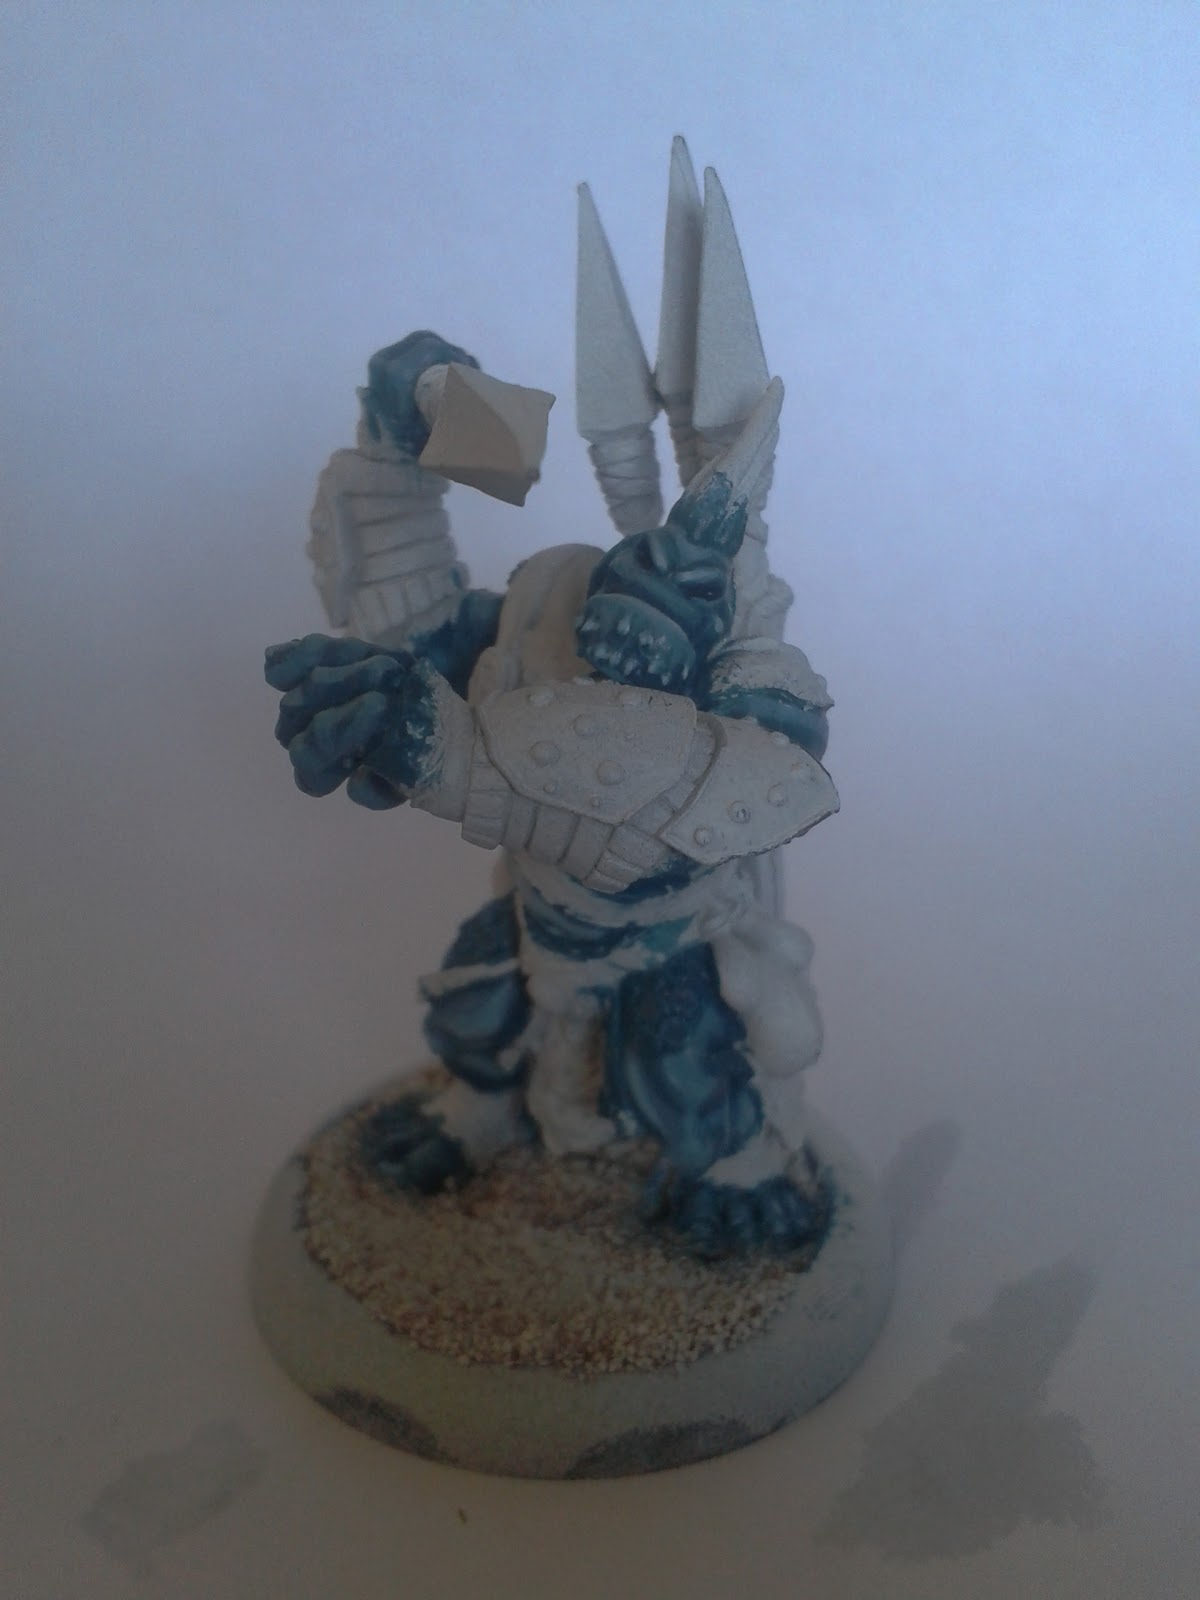
In this blog, I'm going to try and make a proper hobby article, rather than just showing you pictures of what I've painted recently. In my last post I showed you a troll Impaler I painted over a white undercoat, and this is going to show you how I painted the skin tone on the model step by step.
The first thing I want to do with a skin tone, for any model, is get some tones in there that make it look like living tissue, rather than the plasticy base flesh colours straight from the pot. That said, as troll skin should be a turquoise or blue kind of tone, I was going to struggle to do this. blue isn't really a naturally living colour. With human skin, adding some purples or green often helps set the tone, but with blue, you'll just end up getting a different shade.
Next, I didn't want the troll to be bright blue like a smurf. I also didn't have any of the p3 trollblood base or highlight colours, so I had to start from scratch. After a few minutes experimenting with the blues and greens I have, I came up with an answer. A mix of Cygnar Blue Base, and with a splash of Ordic Olive, and I got a more natural fleshy(ish) basecoat mix. With this mix ready to go, and a theory of what I wanted to achieve in my head, we can start painting.
1. Give all the skin areas a careful base coat of 4 parts Cygnar Blue Base, and 1 part Ordic Olive. I tried to be careful, as its quite a dark mix, and any slips would have to be re-undercoated white later on. It took a couple of coats to get a solid colour.


2. Once the base coat was a totally dry, I built up the first highlight, simply adding another part of GW Skull white. I didn't leave much of the base coat showing, as I want a bright look on the finished model, so building the first couple of highlight is more like solidifying the base coat.


3. The second highlight is once again with another part of Skull white. Now the colour has begun to look more turquoise than blue. This stage is the first true highlight, and I started to think about where the light would catch his skin. Also, the inside of he legs and belly got a good blocking in, as these areas will receive a lighter highlight that the rest of the skin.


4. The fourth highlight is the final one for most of the skin. This is what I would call the 'Definintion Highlight' Once again, more skull white, another part, and the mix will now hit sort of sky blue, but with a hint of green. As you paint the highlight, paint a little further back into the shadows, so it doesn't look like his arms disappear into the shadows. The inside of his legs, belly and face, get extra care. Keep a sharp brush when following the lines of his face.


5. The final coat. For this I take 2 parts skull white, and 1 part of the highlight mix from stage 4, and mixed it to make a very light blue. The only gets applied to his face and belly and small quantities. Just touch the end of his eyebrows, a fine line on the top of his lip and the quirky hairy beard thing trolls get. After this i painted in his eyes and hair, so I could gauge how the rest of the model will look.


5. The final coat. For this I take 2 parts skull white, and 1 part of the highlight mix from stage 4, and mixed it to make a very light blue. The only gets applied to his face and belly and small quantities. Just touch the end of his eyebrows, a fine line on the top of his lip and the quirky hairy beard thing trolls get. After this i painted in his eyes and hair, so I could gauge how the rest of the model will look.


So that's about it for troll skin. Note that it does look a bit greener now than it will when he's finished. This is because to the contrast between the white and his skin. Hope this helps the troll players out there!
Gonders
No comments:
Post a Comment