Friday, 25 January 2013

A Chaos General with a Twist.

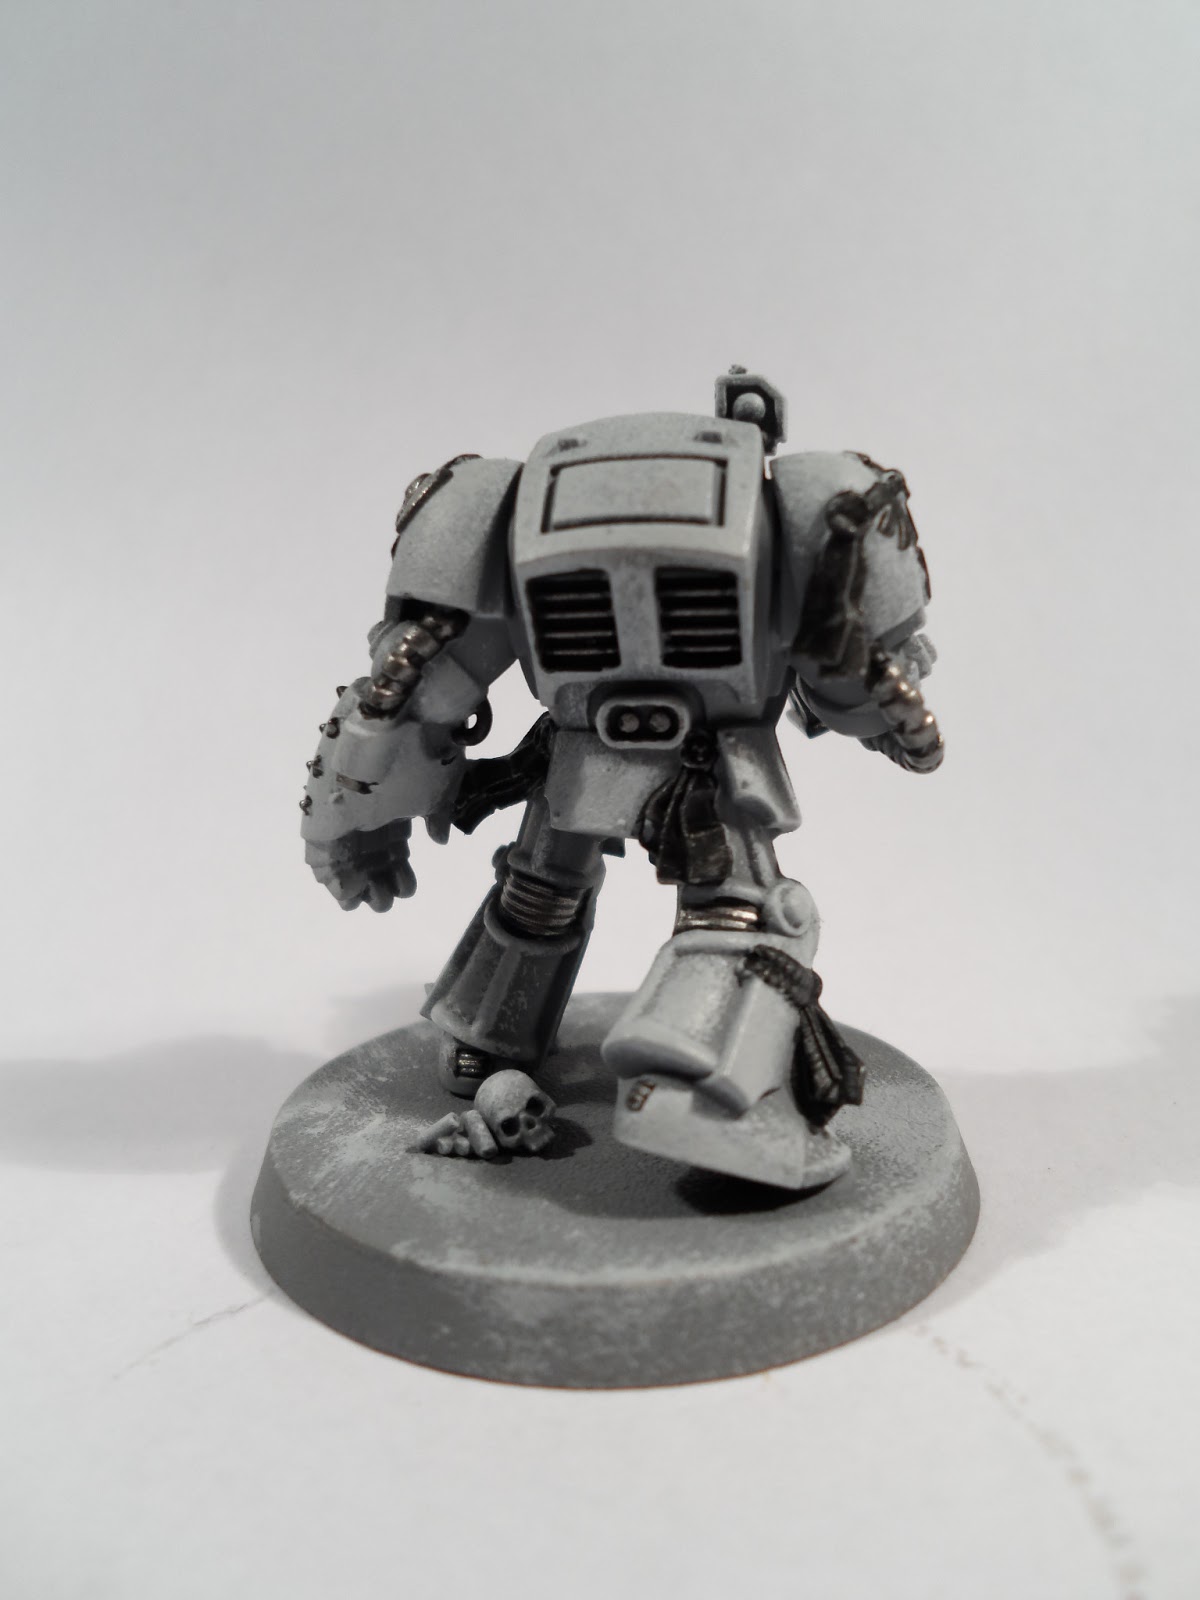
So it's just a little one today. Since I'm waiting for parts from the postman to finish my deamon engine from the the last blog, I thought I'd crack out the old brushes on this guy.


Remember how I mentioned I was going to gel my new chaos army with my old traitor lot? Well this is the guy who's going to be running the whole show. He goes by the name of 'Tanks', but there will be more on that in another post soon. 


I've had this thing sat on my desk for over a year now, and to be honest, I never thought it'd get painted. But now with the start of this new dark mechanicus inspired army, it seemed the perfect chance to get him on the table. 

It's largely built from a Grey Knight's Nemesis Dreadknight, with Defiler armour plating and a series of chaotic upgrades, including weapons from a Deamon Prince(which it will count as in game) kit, and small gauge brass chain. 


As you can see, he is still work in progress, but I think he suits his new granite colour scheme well. I've kept it similar to my titans, so hopefully the whole horde will look the part when there are countless deamon engines and infantry flooding the table!

Gonders

Wednesday, 23 January 2013

One Ugly Forgefiend Conversion.

A couple of a days ago, in true forgeworld style(Except mine wont be that good), I left my blog with a 'sneak peak' of my next project. It was a picture of some sort of chaosy armoured prow, remember?

Well here the sucker is in full view. I plan on adding another wing to my apocalypse army. It's going to be a new army in its own right as well, and it's going to be themed around a chaos cult in the employ of some half insane Warpsmith character. I want the army to have lots of Deamon engines of my own devising. I am actually a huge fan of the big new chaos models, the mauler fiend, forgefiend and heldrake, but i notice at the minute every tom, dick and harry have them on the table. I want my army to stand out from the crowd, and be especially mental. Trust me, I have a lot of idea for more where this came from.   


I had the idea to make this guy a few weeks ago, he is going to be a counts as forgefiend. There's quite a few parts involved, from leman russ turrets to the head of an Ogre Kingdoms Stonehorn. 


He's also one of the first models I've given plasticard modelling ad proper good go at. I've never riveted anything before. It's as boring as you can imagine. I am quite pleased with how it turned out though, especially the shield.


Obviously, he's still work in progess on the building front. The base is pretty much thrown together. It needs filling in around the edges with milliput, so more details, re-enforcing steel rods through the concrete slab, for example.


 The back still needs work too, the chassis looks a bit empty. His left arm is going to get 2 hades autocannons, when my forgefiend kit arrives later this week. There is talk of having to mechatendrills bursting from his belly. I'll see what I can do with those when the kit arrives.

Hope you enjoy the madness! 

Gonders 

Monday, 21 January 2013

20,000! A big thank you!


Just a quick thank you, and to let everyone know, my blog has now had 20,000 hits!

I'm glad that I know my blog is getting read, and that I appreciate every view you guys all provide.

I started out a couple of weeks ago to resolve to try and blog every other day. So far this year, I've managed it. However, it is taking its toll on my life a bit. Firstly, I've got to actually write the posts, but also this means I have to have something painted that worth mentioning!

Because of this, and of course real life commitments(I just bought a house, remember?) I don't know how long I'll be able to keep it up. I want to make sure that the content is relevant and solid as I can make it. In reality, it might mean I only blog twice a week or something, but I'll see how I go.

With that, I'll leave you with a sneak peak of what's on my desk at the moment!


Keep the comments coming!

Til next time,

Gonders

Sunday, 20 January 2013

How to paint Deathwing terminators part 3.

In this post, I'll be finishing of the deathwing terminator I've been showing these last couple of days, and show the finished squad.


 So we need to weather up this guy and get some dirt and damage on to his armour. Firstly, I took a sponge and some acrylic paint, and very gently sponged on the paint in ting amounts dotted around the armour. I was careful to make sure the chipped effect was only applied to the logical places his armour would chip. Edges and rounds are likely areas.


After this, I took some of Forgeworld's 'Dry mud' Weathering powder, and with an old brush applied it dry around the model's feet, and in tiny amounts in other places. Careful when you're weathering, this stuff gets everywhere and doesn't come out of clothes, carpets, etc. Be sure to cover places up first! Less is more with this stuff, but remember it's going to get a coat of varnish that will both seal and dull down your weathering. It takes a few models worth of practise if you've never done it before. I use army painter's anti shine matt varnish. It's just the best on the market I've found so far.  


After you've done that, go back to part one and do the whole thing again...  


 ...5 times. This is my finished dark vengeance squad, ready to strike down some traitorous bastards.

Hopefully, these articles prove helpful for a slightly different take on the deathwing.

Comments always welcome,

Til next time,

Gonders

Saturday, 19 January 2013

How to paint Deathwing Terminators part 2

Today I have part to of how I've been painting Deathwing terminators. Details!


So remember I had a bitch of a job coming up? Grab your black paint, thin it down a tad, a little brush, and get blacking out the details. Everything on the guy that isn't going to be the white armour we did last time needs re undercoating black. This is part of the reason I've never been able to paint these guys before I think. It's a right pain!

Once I'd done that, I also painted the eyes and face in. This is because I wasn't sure how the overall model was going to look, and I wanted to check if the focal point(the face) was going to turn out OK. Small brush, starting was GW red gore base coat(this is after blacking out the eye sockets), then mix a little wazzdakka red in there, about 25/75. One more 50/50 highlight at the very bottom of the eye, and a tiny dot of white at the top for glare.


Next up, metals. I just went with a standard boltgun metal, then black wash over the top here. I guess I could've done more, but that is up to you. There's going to be weathering and damage a plenty to look at when you're done instead.  


After that, I did the green parts. Mostly, this is the chest eagle. I guess if you're painting the new deathwing knights, you'd be going for the robes here too. A base coat of caliban green, with 2 highlights, the first, 50/50 Caliban green/snot green, the second, add a hint of bleached bone to the mix.  


After that, hit the reds. Gun cowling, purity seals, lens'. Use the same method as on the eyes(see above) but without the reflected white dot. 


Creams. I think this is why I did my deathwing in white this time round. When you paint them cream, all the paper and purity seals and ropes and such just blends in with the armour. This way, it stands out enough to see it. Beached bone, with a seraphim sepia wash. Then highlight back up, starting at bleached bone, then adding white for a couple of highlights. 


I also hit some of the armour with a seraphim sepia wash. Only select places, but with the big plates and the white armour, it just helps to break it up a little. When the model is finished, it gets a coat of anti shine varnish that will sort that glare out.

When the purity seals are dry, get a little brush again and paint some lines as text, your best black templar's style.

With that the model is ready for weathering, which is going to come in part 3 of the trilogy!

Thanks for looking.

All feedback is appreciated

Gonders

Wednesday, 16 January 2013

How to paint Deathwing Terminators, Part one.

If you would've asked me a week or so ago, 'Glen, What are the two things you've always struggled to paint?', the answers would've come to me easily.

Firstly, I've never, EVER, been able to finish an elf/eldar army of any type. I don't know why, there's something about them I've never been able to get quite right.

My second answer would be 'Deathwing Terminators'. For years, I've never had it in me to get their bone armour right. None of the painting guides I could find ever helped me, it just couldn't do it.

With the release of, to start with, the dark vengeance set, and now the new dark angel's codex, I knew now was the time to confront my deamons. Naturally, that means finding a cheats way of doing things.

I knew I couldn't get the cream armour right. So I decided to do them grey-white. I've seen this done a few times, and I quite like the finished product. The key to getting it right, involves getting everything else on the model that's not the armour looking neat and correct. A healthy dose of weathering too, and I hopefully can come up with a convincing version without having to tear my hair out over cream armour.   


A good couple of hours on a Sunday afternoon, and this is how the test model for the squad turned out. You can see a couple of issues that I'm not overly happy with, but bearing in mind I don't normally get deathwing terminators this far, I can live with it on the test. Lets just hope the rest of the squad can match in.


The obvious one, is that the face is over highlighted. In reality, it doesn't look quite as pronounced in real life as it does on the pictures, but it still needs addressing.


The other minor gripe I have, is that I didn't tip the feathers with green, like they always were in the 90's. I can probably fit this in later on.

Next up, I'm going to try and do a painting guide for all those who struggle as much as i did.


The first thing to do, is to prime your model with a medium grey. Being in the U.K, I used Halford's car primer. Cheap and cheerful, and I had a boat load left from paint forgeworld models(it covers resin well too).


Next up, Grab a little sponge, mix some medium grey(I used codex grey) with some white. about 75/25 grey to white. To thing to remember when painting white(or black, for that matter) it that being at the extreme ends on the spectrum, a little bit changes your base colour a lot. Start sponging the mix on, trying to get in all over the armour, even in the recesses to a degree. Leave some shadows showing through, however.


Next up, add a splash more white to your mix. Carry on sponging(with a clean sponge this time) and hit only the higher parts on the armour. It's worth noting, it doesn't have to be to neat, it is sponging after all, but we're just trying to catch the higher parts of the plates. Repeat this process, creating finer and finer highlights, I think I did 4 coats to get to the stage about. At the final layer, you should have 75/25 white to grey in the your mix. 

For now, put your feet up, have a brew and that, because the first job coming up in part two its a right bitch...

Til then, 

Gonders


Monday, 14 January 2013

Photo practice with some Robed Dark Angels.

I'm all over painting at the minute, I'm getting loads done. Today I bring you some of my long suffering dark angels. These guys are long suffering for two reasons.

Firstly, there is a whole army of them sat next to my painting table, half painted. I always seem to have something better to paint, most of the time its idea to do with the large chaos horde I'm always building.

Secondly, down at our club, we've been running a 40k campaign that have lasted for the last 4 months, and is set to go on for 3-4 more. For far(I blame a 4th edition codex), my poor dark angels have been battered, burned, or squashed be huge monsters pretty much every week. In honour of the new codex, I've finished(nearly) this here tactical squad.


As mentioned in earlier posts, I got a new camera set up for Christmas, which I'm still trying to get the hang of somewhat. This picture is somewhat dark, but I'm trying to sort it out. Only thing left to do is a free hand banner and we're done here. 


So members of the squad, a little better lit this time. 


If there's one thing I'll be good at by the end of this army, it'll be painting dark angels symbols! I'm glad with how these are turning out. This is also the first marine army I've managed to paint the eyes properly, as can be seen in these last couple of shots. 

Thanks for looking.

Gonders