Friday 23 March 2012

Blue Rage, A Dire Troll Mauler.

Following on from this week's Extreme Dentistry post, I now have the pictures of the finished Dire Troll mauler I've been painting recently. This guy is actually one of quite a few Trollblood mini's I've been painting recently.

Simple enough, on to the pictures!


I wanted to do sightly different skin tones for each of the Trollblood species. The dire trolls are going to be a little bluer than the fullblood Troll, who have a green tint.


Having said that, after I'd highlighted him, he looked a bit plasticy. I solved this with a purple wash so his softer areas.


So there we have it. One troll, ready to tear someone a new one.

Gonders

Wednesday 21 March 2012

Extreme Dentistry, Replacing a Dire Troll's Gnashers.

As mentioned in the couple of posts, I've bought some trollbloods off a friend to try and teach myself the HORDES system in time for me to play this tournament in may.

Part of the deal was a dire troll mauler, which despite not having been painted, was unfortunately missing his bottom rather large fangs.

As it happened, I didn't have a spare pair to hand, but I did have my trusty dremel, a bunch of paper clips and some greenstuff to hand...

Open wide and say 'Arrrrgh...'


 First up, I drilled out the recesses in his gums where his teeth would normally sit. Quick blast with the dremel here with a 1.8mm bit makes light work.


Next up, I cut some paper clips to about 10mm and glued them in. Once these dried, it was easy enough to bend them into a slight curve in the shape his teeth should've been with a pair of clippers.


After this I flattened a lump of green stuff into a rectangle, about 18mmx4mm, and wrapped it round the paper clip, pushing the end into the gums. Once the gum-end held, I twisted the other end like a green flump, and gently stretched it into a point. Kind of hard to describe, but the best I've got!


Repeat, then leave to dry. Once solid, I filled any gaps and he's ready to rock 'n' roll.


Keep an eye out for the finished pictures of his paint job, coming up soon!


Gonders

Sunday 11 March 2012

How to paint Trollblood Skin, step by step.


In this blog, I'm going to try and make a proper hobby article, rather than just showing you pictures of what I've painted recently. In my last post I showed you a troll Impaler I painted over a white undercoat, and this is going to show you how I painted the skin tone on the model step by step. 

The first thing I want to do with a skin tone, for any model, is get some tones in there that make it look like living tissue, rather than the plasticy base flesh colours straight from the pot. That said, as troll skin should be a turquoise or blue kind of tone, I was going to struggle to do this. blue isn't really a naturally living colour. With human skin, adding some purples or green often helps set the tone, but with blue, you'll just end up getting a different shade.

Next, I didn't want the troll to be bright blue like a smurf. I also didn't have any of the p3 trollblood base or highlight colours, so I had to start from scratch. After a few minutes experimenting with the blues and greens I have, I came up with an answer. A mix of Cygnar Blue Base, and with a splash of Ordic Olive, and I got a more natural fleshy(ish) basecoat mix. With this mix ready to go, and a theory of what I wanted to achieve in my head, we can start painting. 

1. Give all the skin areas a careful base coat of 4 parts Cygnar Blue Base, and 1 part Ordic Olive. I tried to be careful, as its quite a dark mix, and any slips would have to be re-undercoated white later on. It took a couple of coats to get a solid colour.


2. Once the base coat was a totally dry, I built up the first highlight, simply adding another part of GW Skull white. I didn't leave much of the base coat showing, as I want a bright look on the finished model, so building the first couple of highlight is more like solidifying the base coat.


3. The second highlight is once again with another part of Skull white. Now the colour has begun to look more turquoise than blue. This stage is the first true highlight, and I started to think about where the light would catch his skin. Also, the inside of he legs and belly got a good blocking in, as these areas will receive a lighter highlight that the rest of the skin.


4. The fourth highlight is the final one for most of the skin. This is what I would call the 'Definintion Highlight' Once again, more skull white, another part, and the mix will now hit sort of sky blue, but with a hint of green. As you paint the highlight, paint a little further back into the shadows, so it doesn't look like his arms disappear into the shadows. The inside of his legs, belly and face, get extra care. Keep a sharp brush when following the lines of his face.


5. The final coat. For this I take 2 parts skull white, and 1 part of the highlight mix from stage 4, and mixed it to make a very light blue. The only gets applied to his face and belly and small quantities. Just touch the end of his eyebrows, a fine line on the top of his lip and the quirky hairy beard thing trolls get. After this i painted in his eyes and hair, so I could gauge how the rest of the model will look.


 So that's about it for troll skin. Note that it does look a bit greener now than it will when he's finished. This is because to the contrast between the white and his skin. Hope this helps the troll players out there! 

Gonders


Friday 9 March 2012

The Great White Trollblood Challenge!

I don't know about you, but I can't remember the last time I painted something from a white basecoat.
Black is a much more forgiving colour, shades itself, and fits my painting style well.

However, with the upcoming tournament for Warmachine, and me having now got my feet firmly planted in the mark 2 rules, I realised there's a whole other tactical angle I've not even thought about yet.

Fury.

When we played mark 1, we stopped about 6 months after hordes was first released. We didn't give it much of a chance really, but now, Hordes is a whole other animal. Also, at the time of writing, I currently know no hordes players. This means I don't know how to fight them.

So without trying to make people play hordes just for my benefit, how do I learn the system? A guy I know was selling some trollbloods from mark 1, so I bought them up and am going to teach myself the basics of fury management before I get steamrolled by hordes players at the tourny in May.

I also saw this as a chance to challenge my painting skills too, as the trolls have a very cartoon looking style, my regular grim dark painting just wont do. I need bright bold colours, and for that, I need a white primer.

So its a twin challenge. Firstly, to teach myself what to expect from hordes, and second, to change my painting to fit the hungry trolls.

So I started off with my first Trollblood model, the impaler. Yep, out of focus I know, but its 2 primed models, what do you need?


Ok, so a bit of brush work and...

I've finished the first impaler, and he looks like this:


I'm quite happy with him, but he took maybe twice the time he would've with a black undercoat. Do the ends justify the means? I'm not quite sure yet.


So hopefully, I can get a small army of these guys painted up soon.

I'll be a step by step of how to paint troll skin this week too for any who want it.

Gonders 

Thursday 1 March 2012

Man of Adamantium, Iron Hand Straken. Stupid decisions

So who remembers my rebel guard army from last year? No one..? OK, not a problem. Well anyway, if you've noticed, I recently joined the lost boys gaming club in southport, and I noticed they're holding a 40k tournament this weekend, on the 3rd march.

I hadn't paid it any attention, til last weekend, just 7 days before the tournament, where I suddenly decided entering a tournament for a game system I've not played in months, and never was any good at, was a good idea. 

Wait, what?

To late, ticket bought. Shit.

So, OK, I've got 3 games of 40k to play, with an army that was built for apocalypse last year. Meta game? I don't even know whats good anymore. OK, I'm not panicking. I have a plan....

The last 2 guard armies I've played have had commissars. The latest one has Commissars and power weapons. Last weekend I started leafing through the 'guard codex to find me a plan...

Soon after, it became clear, I needed a hero.

Not just any hero.

A hero that can make a guard army with power weapons not only hold the line, but bite back!

A hero that lives by pulling people's behind's out of the fire!

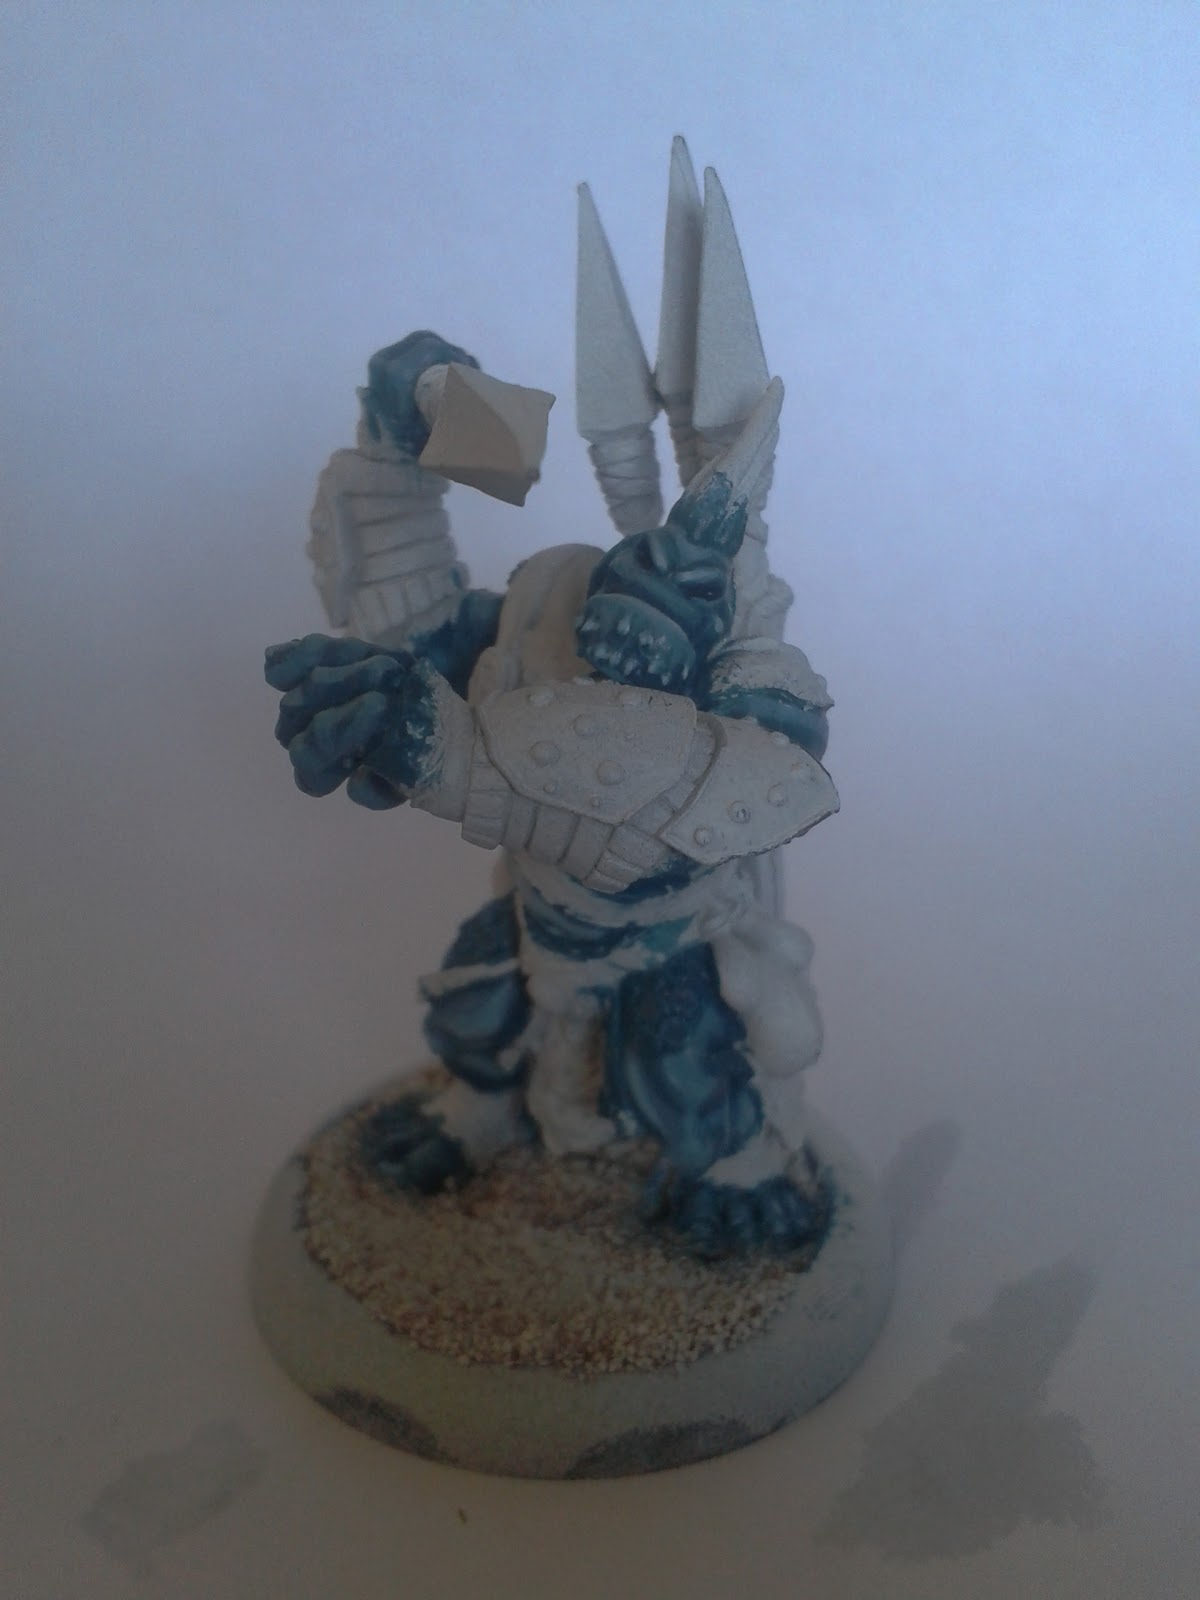
A hero, I, somewhere at the bottom of a bits box, had an old school 3rd edition model of!

I'm talking about tough as old boots, swearing like the pissed off trooper he is, been in so many fights and come out alive, Col 'Iron hand' Straken, of course!


One quick paint job enough to get him on the board, and the tough of bastard is ready to rock and roll.

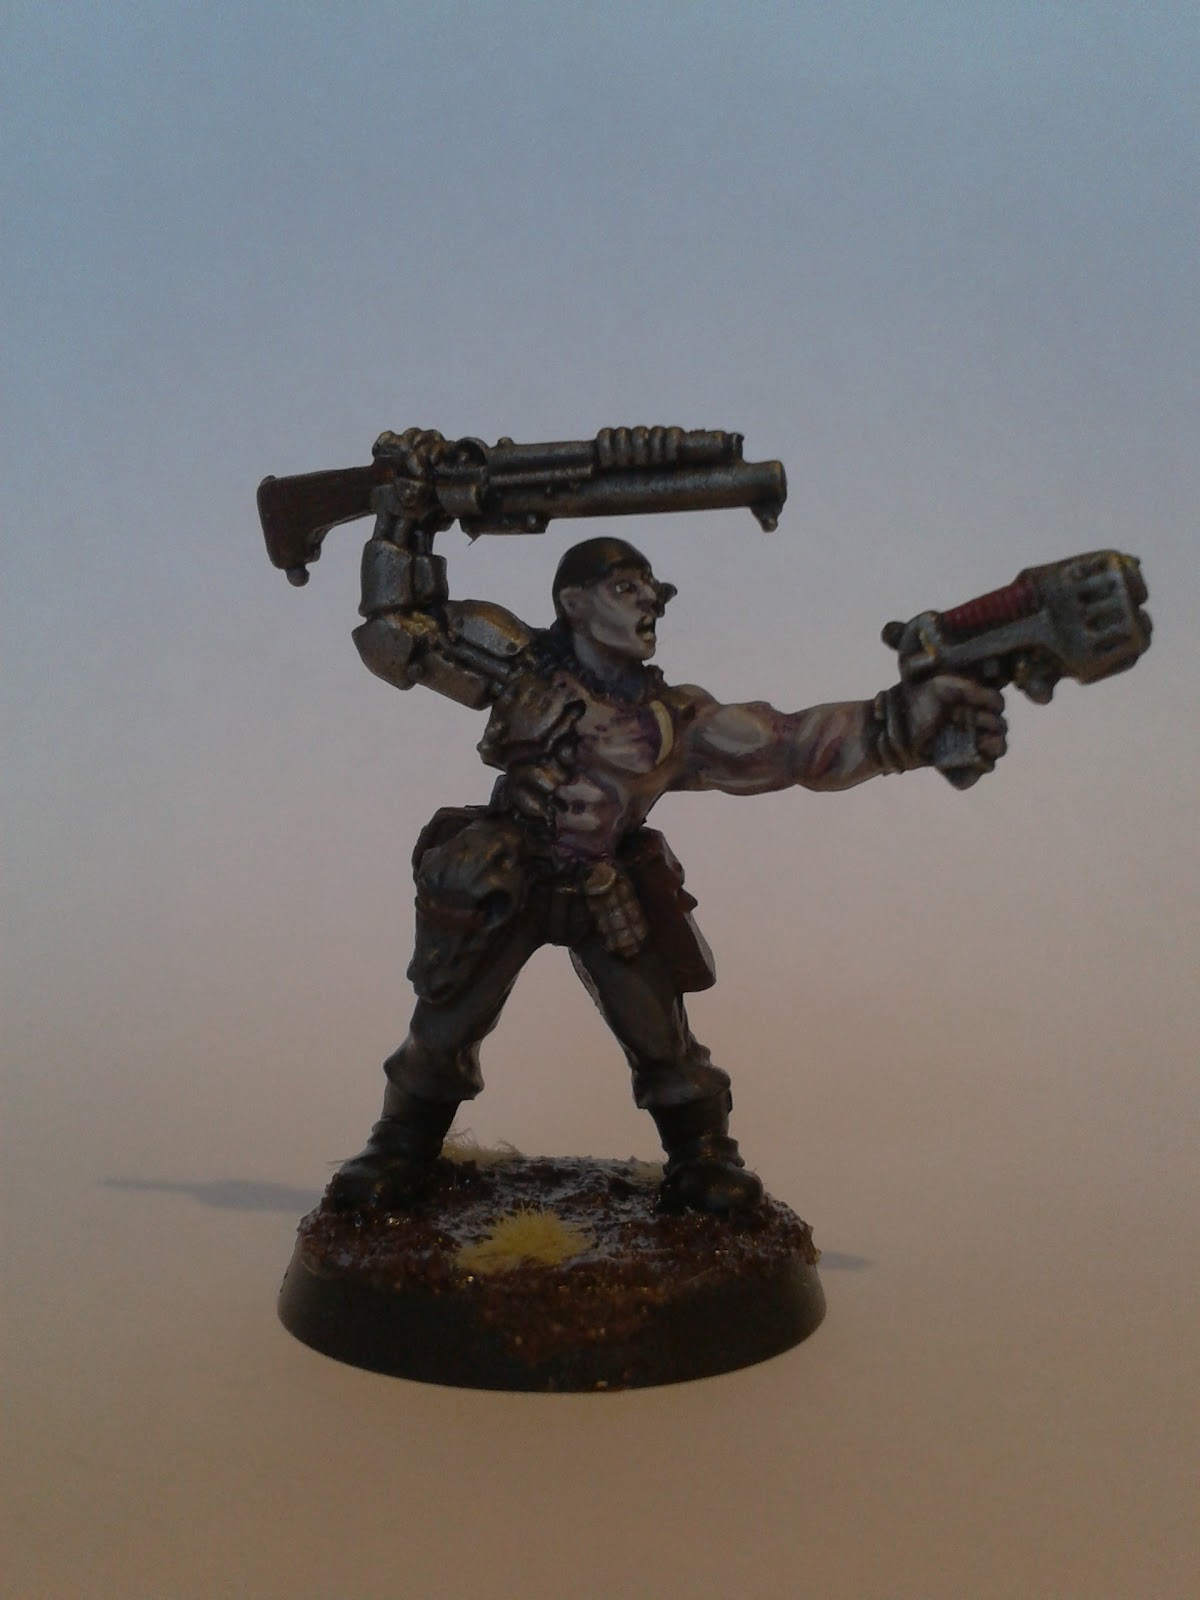
After I built him a horde of guardsmen ready to march into certain meta game death, with as many rapid firing guns for sheer desperation factor, I had 15pts left to spend, and a bunch of old bits boxes worth of models.

One such model was dying to be included in the army, now newly promoted from 'forgotten about' to, 'Col Straken's right hand bodguard'. 


So we're ready. The 2nd Thraxis Swamp Stompers stand ready to march to war and throw themselves under the guns of the 40k universe once again. 

The best I can hope for is to hold the line. The worse, I think I might find out how many models people can remove in a single turn.

So until next time, Where i shall report on my lack of success.

Gonders