In and effort to keep my blog rolling in the start of the this new year, I'm back already with my 3rd post in a week. If you've been following, you'll knwo I've been working on a Forgeworld Chaos Warhound Titan, which will be painted in the same scheme as my Reaver from a year or so ago.
So last time, I had cleaned up, pinned and glued the main torso together, making the 3rd module to paint, following the base and the legs. Today I'm going to show you how I cleaned up the guns for the machine and how I turned the biggest flamer in the game traitor.
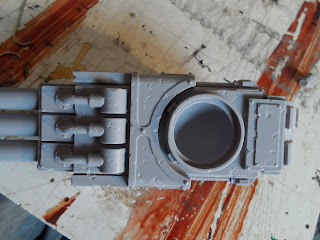
First thing to do with a Titan when it comes to its guns, is to choose 2. Forgeworld make both a plasma blastgun, and a vulcan megabolter in the chaos and Imperial varity, and also a turbolaser destructor and an inferno gun in Imperial. As you can see above, I choose a plasma blastgun, and an Inferno gun for this titan.
'What, no strength 'D'?' I hear you cry? Well, no. The reason for this firstly is, Strength 'D'(I.e. turbolasers) are quite predictable. All to often on the Internet do you see titans with all turbolasers or the like. Now, I do own titans with turbo lasers, and I admit I'm in the rare position of being able to look at a titan and not see the need for them. I guess with this guy, I just wanted a change.
The second reason for choosing an Inferno gun, is that is it the shortest ranged titan weapon you can get. If you've ever seen a titan in a game of apocalypse, you'll know 99% of the time, they stand in one spot, lording it over the battlefield, blazing away. But that's it. They don't need to move, as they can reach everything anyway. when you have ranges of 96''+ why move?
I want this one to have to run like the hunting hound it is. I want it to sprint over to the enemy line and torch them out of their trenches. Something about that just seems... Chaotic.
So, i started to traitorify the Inferno gun. I started chipping away with a 1mm drill bit in my dremel, just nicking the edges of plates, here and there, so it would match in with the rest of the machine. I drilled out a section on the cowling, and a couple of bigger chucks on the fuel tank to make it look the part too. I took some greenstuff and sculpted just a little bit of corrupted goo on there. Not to much because I can't sculpt that well, but just enough to know whats going on.
After this it was just a case of pinning the weapons and mountings on loosely, so I could play around with the posing. After all, the guns are it's arms, so they on important to how the over all machine will look.
With that, it's more or less ready to get some paint on. Hopefully, I can crack on with that before to long!
Til next time
Gonders


No comments:
Post a Comment