Ok, so most of my Sunday went into this thing too... Lets have a see, where did we leave off? Legs pinned and glued on Saturday, Sunday goes as follows...
First off, I had to get the titan a base. Then I can pin him to it, take him off again and begin painting. So I marked out roughly where he was going to stand on his broken Aquila. The base is 12mm MDF. My earlier titan had an 18mm one and it looks to heavy. Yet another warhound lesson learnt.
 | ||
Next, using an ancient joiner's technique known only as 'Two pins an' a bit o' boot lace', I marked out the oval shape I wanted. The picture pretty much explains it. Mark out a cross down the middle, hammer two pins in and use a shoe lace as a guide. As you can see, it takes a bit of trial and error to get just the right shape. See, being a tradesman has its advantages in this hobby.
I cut out the base using a coping saw, Just follow the lines and take your time. I forgot to take a picture.
After that, I pinned the extra leg and groin armour on that I hadn't by then, and started detailing the base.
Did the piping between his legs too. That was a pain...
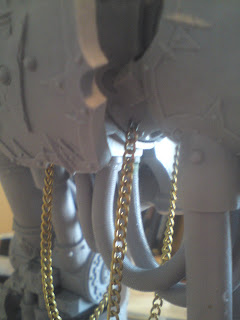
Added some chain between his legs to make him extra gnarly too.
This was done buy pinning a tiny bit of bent paper clip in place and hooking some brass chain through it:
Bit of battle damage, experimented by trying a forgeworld master class style shell impact(note, NOT a 'bullet 'ole', my titan does not get bullet holes like a soggy cardboard box, thanks). Done by grinding out a chunk of resin, then filling the hole with green stuff, smoothing it off and sculpting a shell strike in it.
Added waist joint...
 | ||||||||
Yeah, standin' tall!
I started pinning the torso together. Its worth noting at this point, none of the work today had involved any glue(apart from the chain and the pipes between his legs)
The titan at its full height. Bloody tall. Yet more pinning without glue...
Coming together. These last few pics speak for themselves really. Pinned the pipes on his head and glues them.
The laser blaster I pinned and glued together, but not in, late on last night. This is how he looks now. I'm quite impressed that my pinning skills are enough to hold it together without glue. This is a good omen for the future.
Well, until next time.
Gonders


Looking good mate - I really like what you have done for the base - fits the model beautifully.
ReplyDelete